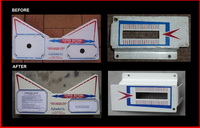
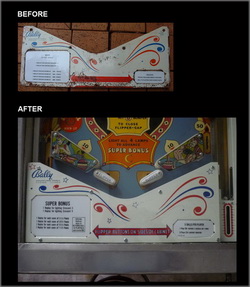
APRON ART USING WATER SLIDE DECALS
Tools and Materials Required
Images printed on a WHITE backing sheet - these are perfect for dark backgrounds or when you need white (as a printer won't print white ink).
A4 Scanner (Don't worry if you cant scan the whole apron, scan sections.)
Any cheap Inkjet Printer (These decals use less ink than the normal decal or photo paper, so its works out cheaper)
Photoshop or Paint program. (Best to scan and print through Photoshop as they come out the original size) also a good program for cleaning and touching up the artwork.
Clear Water Slide Paper (You wont find it at officeworks, best to search online.)
Sandpaper, Spray Can of Acrylic Primer and Spray Can of Acrylic Paint, I used Sno White (Available from Supa Cheap Auto)
Spray Can of White Knight Crystal Clear Acrylic from Bunnings.
Sharp pair of sissors to cut out transfer and a bowl of water to remove the transfer.
Applying The Transfers
Rub back the paint on the apron, apply a couple of coats of primer then a couple of coats of the top coat (I also painted the Shooter cover as well as the top apron).
Print the design on the glossy side of the decal paper. Leave the printed paper to dry for at least 30 minutes.
Coat the printed paper with a clear acrylic spray. Apply 2 to 3 coats to obtain a clear shiny finish on the paper. This will ensure the ink is sealed on the paper. Allow half to one hour to dry and set. During winter or humid days use a hairdryer to speed up the process.
Once dry, the design or image can be cut out using a sharp pair of scissors or craft knife.
After the transfer has been cut from the sheet, place into a bowl or cup of clean water for approximately 30 seconds.
When the transfer film begins to slip from the backing paper, it is ready to apply to the apron. Slip a small amount of the transfer from the backing to the apron, then gently remove the backing paper while applying the film to the apron.
After completely dry, spray complete apron with 1 to 2 coats of clear.
TIP : When cutting out transfers, cut as close as possible to the artwork - Avoid straight lines, use curves around letters - it looks better and looks like a paint layer. Practice on a spare piece of metal or a trashed apron before rubbing back your original apron in case you don't like the final result.


Early Bally Apron - Bazaar


Bally Midway Apron - Pool Sharks

